
EchoTracerUser guide
Scan your surroundings using ultrasonic distance readings, compare them with an initial reference scan, and receive alerts when readings change.
Contents
Get to know the buttons
With the screen facing you, the three front buttons are A (left), B (centre) and C (right). Press and release a button once for each action. The symbols along the bottom of the screen show the current button functions. Use the physical buttons to operate these screens.
| Screen or state | A — left | B — centre | C — right |
|---|---|---|---|
| Scan stopped | Open menu | Start a new scan | Change displayed distance range |
| Scan running | Change display mode | Stop scan and clear readings | Change displayed distance range |
| Main menu | Move up | Open highlighted item | Move down |
| App Settings | Save and return to menu | Change highlighted value | Select next setting |
| Time Settings | Return to menu | Open highlighted item | Switch between Time Zone and BST |
| Time Zone | Return to Time Settings | Adjust by 30 minutes | Switch between + and − |
| BST | Return to Time Settings | Save current choice | Toggle Off / On and save |
| Firmware updater | Back / Cancel | Check again, when no install prompt is shown | Install, when prompted |
Turn EchoTracer on and off
EchoTracer has a small red power button on its left side. This is separate from the three front buttons A, B and C.
Turn on
- Press the red side power button once.
- Wait for the loading and connection checks to finish. The stopped scan screen appears when EchoTracer is ready.
Turn off
- If a scan is running, press the centre front button B to stop it. If you changed App Settings, leave that screen with A to save first.
- Disconnect the USB charging cable if it is attached.
- Quickly press the red side power button twice to switch the device off.
Charge the battery
- Connect the USB cable to the device’s USB-C port and a suitable 5 V USB power source.
- Connecting USB power turns the device on. This is normal: EchoTracer can remain on while the battery charges.
- If you only want to charge, leave EchoTracer on the stopped scan screen. If scanning is active, press the centre front button B to stop it.
- On the scan screen, a blue outline around the battery icon indicates charging. The battery segments provide an approximate charge level.
- When you want to switch off after charging, unplug the USB cable and quickly press the red side power button twice.
The device normally stays powered on while USB power is connected. Disconnect USB before switching it off. Unplugging the cable alone is not the shutdown step; use the double press afterwards. EchoTracer continues to show its normal interface while charging.
Power-button operation and USB power behaviour: Hardware power reference.
Start your first scan
- With the device switched off, make sure its supplied microSD card is inserted. Keep the licence file on the card.
- Press the red side power button once to switch on. Wait for the loading and connection checks to finish. EchoTracer opens on the stopped scan screen.
- Place the device in its intended scanning position. Keep it still while establishing the reference readings.
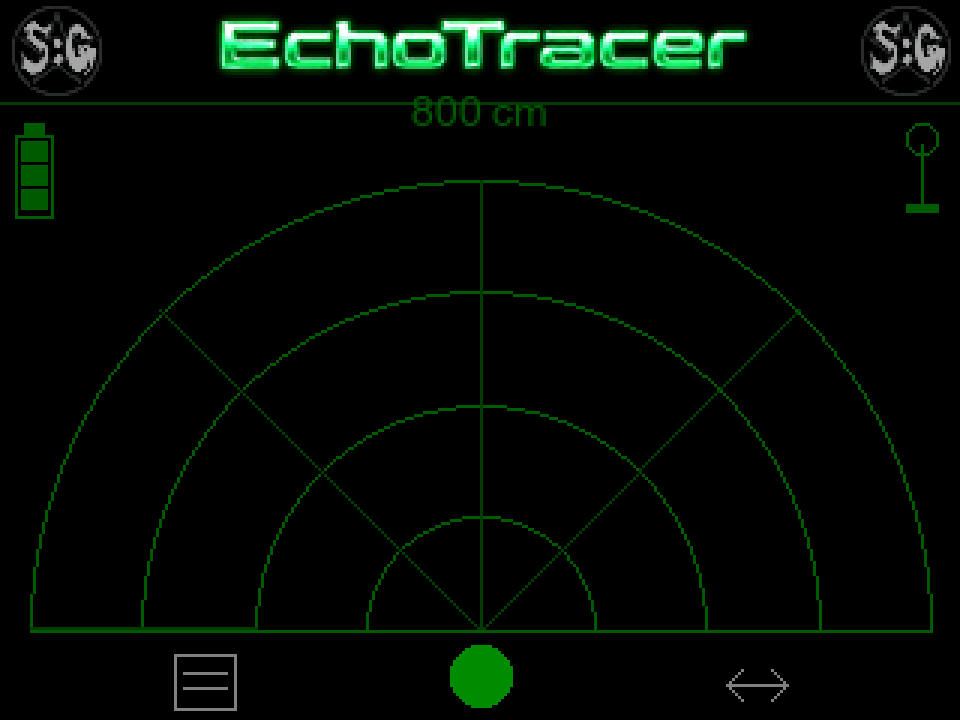
- If needed, press C to choose the displayed distance range. Read the distance value at the top centre of the screen.
- Press B to start. The centre symbol becomes a red stop square. Allow the first two one-way sweeps to complete while Calibrating appears. These establish the reference readings in both directions.
- Leave the device scanning to compare subsequent readings with that reference.
- Press B to stop. Stopping clears the scan readings; the next start establishes a new reference.
Read the scan display
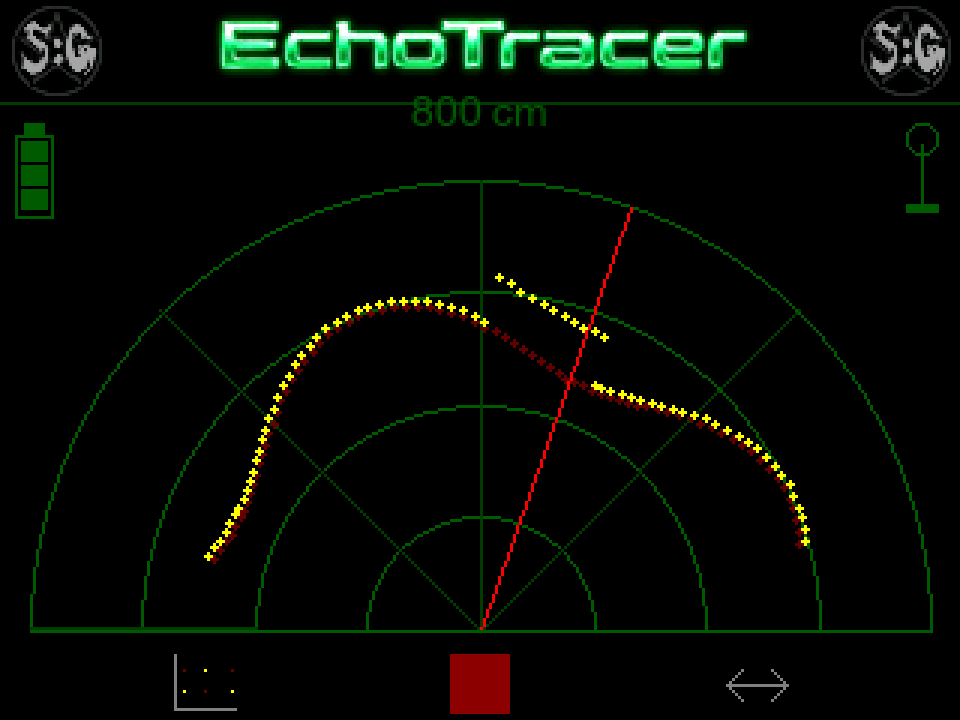
- Dark red points or lines: the reference distances recorded during calibration.
- Yellow points or lines: subsequent distance readings. In blip mode, yellow marks appear only where the change exceeds the tolerance.
- Bright red sweep line: the current scan position.
- Range at the top centre: the distance represented by the outer ring. The inner rings divide this into roughly quarter-range steps. Readings beyond the selected range are drawn at the outer edge.
- Battery icon: an approximate charge level; a red bottom segment indicates a low reported level. A blue outline indicates charging.
- Connection icon on the right: green indicates the device’s recorded Wi-Fi connection state; red indicates no recorded connection. A blue ring indicates a ParaLink connection.
A change alert means that a distance reading differs from its reference by more than your selected tolerance. The display does not identify what caused the change. Invalid or missing ultrasonic readings may be omitted.
Connection aerial: what each colour means
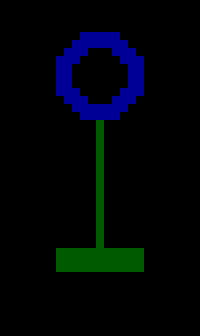
Look for the small aerial on the right of the scan screen. Match it to the enlarged symbols below.

No Wi-Fi connection
A red aerial means EchoTracer has no recorded Wi-Fi connection. Scanning is still available. Check your Wi-Fi settings and restart to reconnect.

Wi-Fi connected
A green aerial means EchoTracer recorded a successful Wi-Fi connection. A green ring alone does not indicate a ParaLink-Mesh connection.
ParaLink-Mesh connected
A blue ring at the top of the green aerial means EchoTracer is connected to ParaLink-Mesh. The stem and base stay green.
These symbols are enlarged from the connection-icon drawing code. The red and green states reflect the connection recorded by EchoTracer; they do not continuously verify internet access.
Change the scan view
While scanning, press A to cycle through Points → Lines → Blips → Points. Points show individual readings; Lines join neighbouring readings; Blips show changes exceeding the tolerance. Changing view does not start a new calibration.
Press C on the scan screen to cycle the displayed range. From the startup value of 800 cm, the sequence is 700, 600, 500, 400, 300, 200, 100, 50, then 800 cm again. This changes the display scale; it does not guarantee that the sensor can measure reliably at every listed distance.
Open the menu
- If a scan is running, press B to stop it.
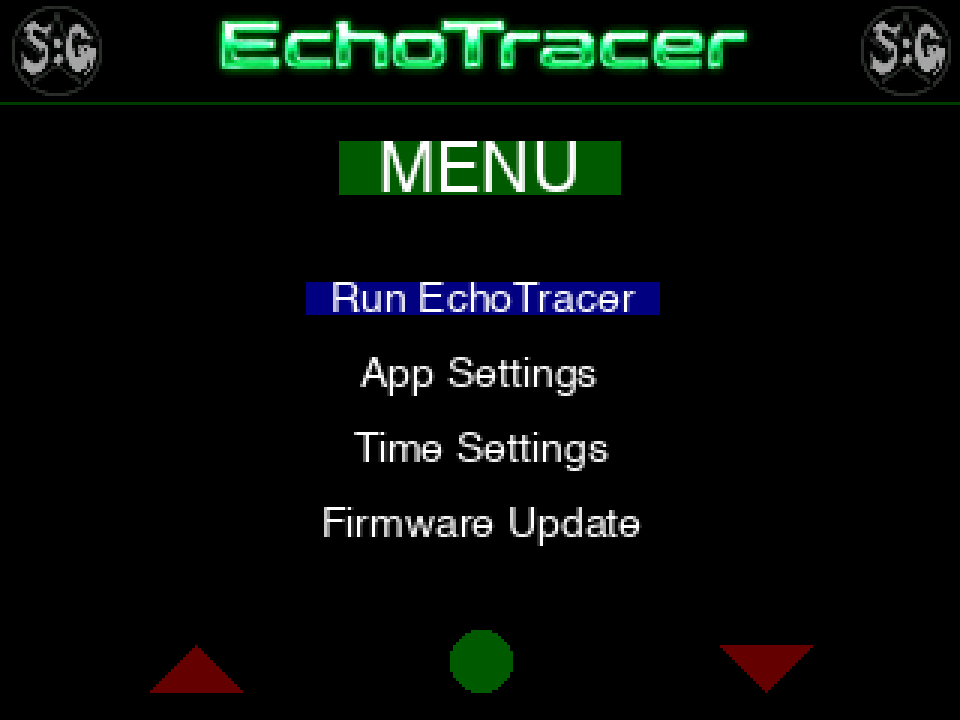
- Press A to open the menu.
- Use A to move up and C to move down. Press B to open the highlighted item.
- Choose Run EchoTracer to return to the scan screen. Press B there to start scanning.
Adjust alerts and image saving
- Open the menu and select App Settings.
- Press C until the setting you want is highlighted. The selection cycles back to the first setting after Save Images.
- Press B to change its value. Repeat as needed.
- Press A to save your choices to the card and return to the menu.
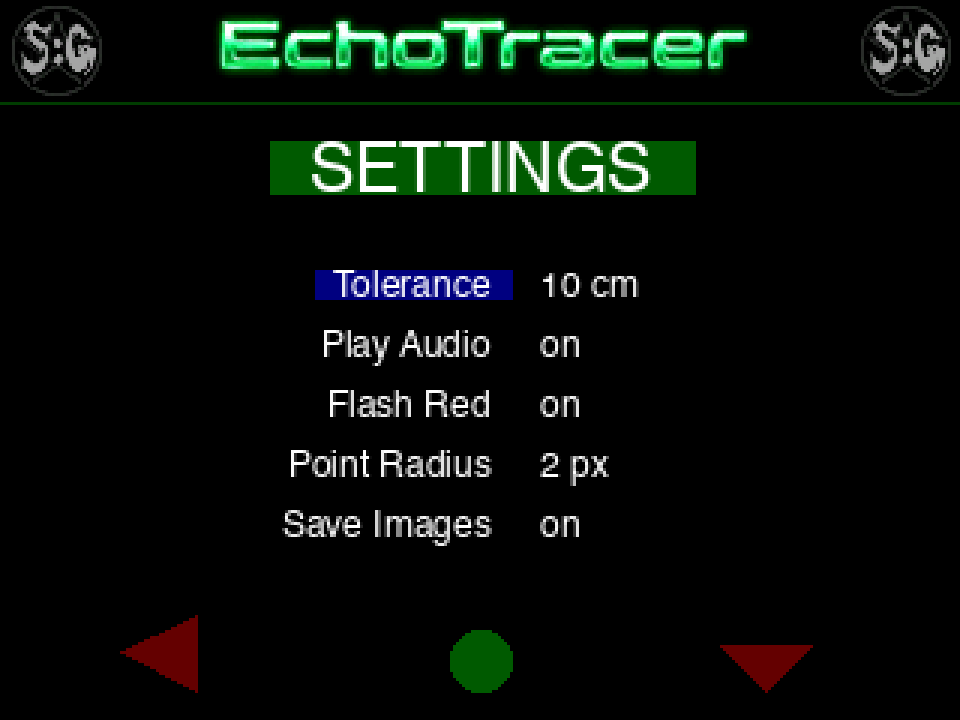
| Setting | Choices | What it does |
|---|---|---|
| Tolerance | 0–30 cm, in 1 cm steps | A change must exceed this amount to trigger an alert. A larger value ignores smaller changes. After 30, the value cycles to 0. |
| Play Audio | off / on | Enables a short tone when a qualifying change is detected. |
| Flash Red | off / on | Makes the outer ring and baseline turn dark red briefly during a change alert. Works independently of audible sound. |
| Point Radius | 1 / 2 / 3 px | Changes point size in point mode. The value cycles back to 1 after 3. |
| Save Images | off / on | Saves a scan image at the end of a one-way sweep if a qualifying change occurred during that sweep. |
Find saved scan images
Enable Save Images before scanning. Images are saved automatically for sweeps containing a detected change; this is not continuous video or a manual screenshot button.
- Stop scanning and switch the device off before removing the microSD card.
- Insert the card into a computer or card reader.
- If the clock was synchronised, look in
DateTimeFiles/YYYY-MM-DD/. Files are named likeimage_HH-MM-SS_0.bmp, with a sequence number to distinguish captures. - If time was unavailable, look in
NumberedFiles/for files such asimage_1.bmp. - Copy the BMP images to your computer. Return the card to the device before switching it on again.
Set the local time
The clock synchronises over the internet. Time Zone and BST adjust the displayed local time and the dates and times used for new image filenames. They do not manually set the clock.
- Open Menu → Time Settings.
- Press C to highlight Time Zone, then press B.
- The + option is selected when you enter. Press B to increase the offset by 30 minutes. To decrease it, press C to select −, then press B.
- Repeat until the required offset is displayed. Offsets range from GMT −12:00 to GMT +14:00 and wrap around at either end. Changes save immediately.
- Press A to return to Time Settings.
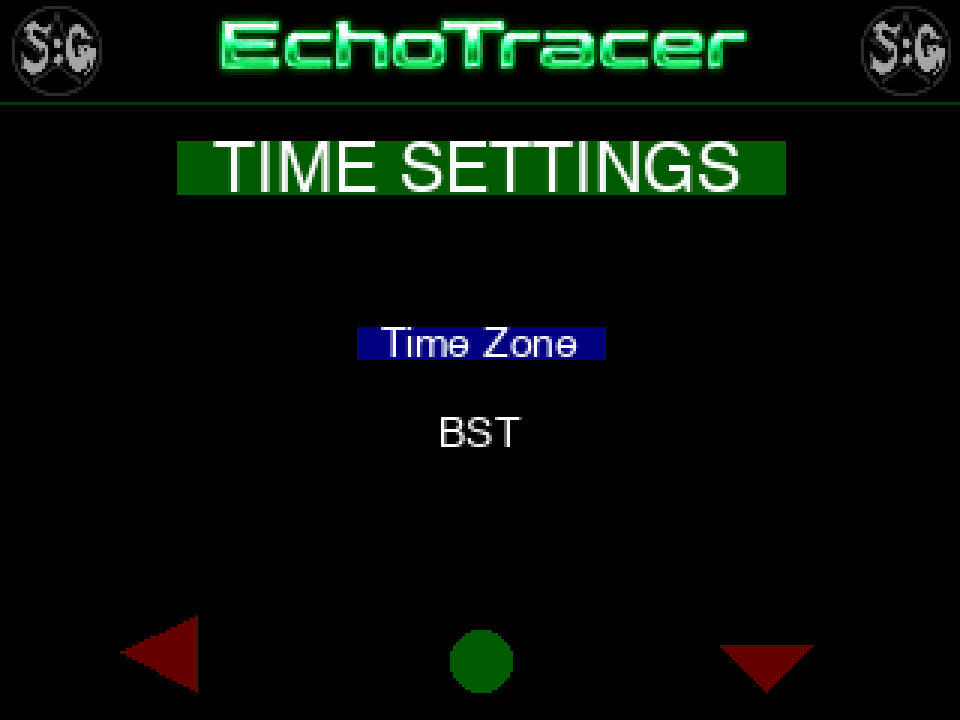
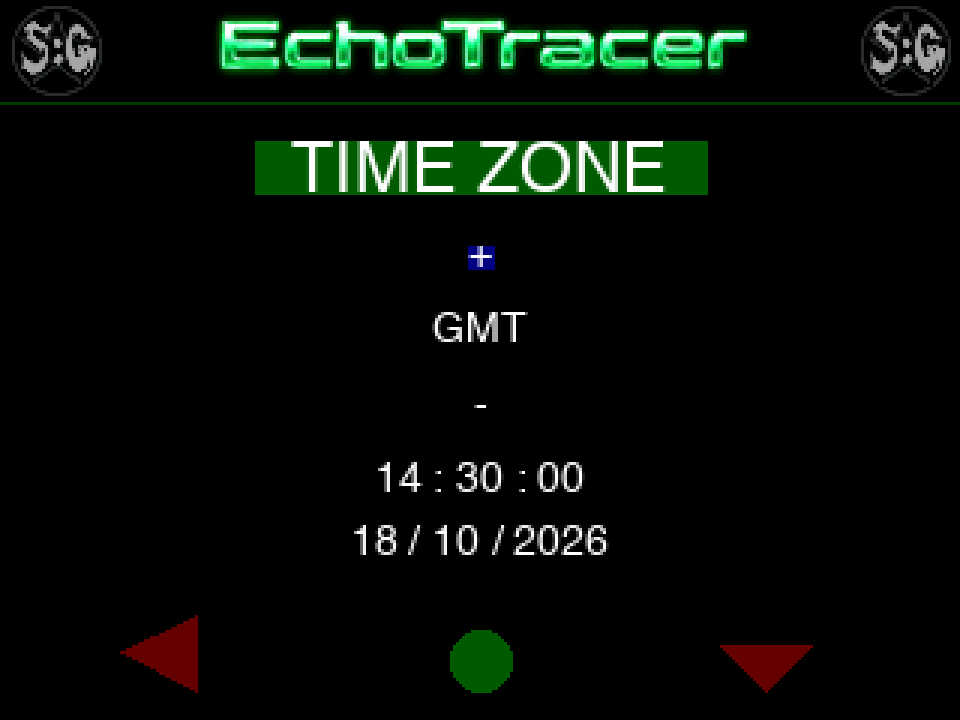
Switch BST on or off
- In Time Settings, press C to highlight BST, then press B.
- Press C to toggle between Off and On. Each change saves immediately. On adds one hour to your Time Zone setting.
- Press A to return.
BST is a manual setting; it does not change automatically with the seasons. For UK time, use GMT with BST Off in winter and GMT with BST On during British Summer Time. If the screen says Time not synced, provide an internet connection and allow the clock to synchronise.

Connect to Wi-Fi
Scanning can run without an internet connection. Wi-Fi is used for clock synchronisation, firmware checks and the ParaLink connection. You can connect to a home Wi-Fi network or a phone’s Wi-Fi hotspot. Network details are supplied through a file on the card.
- Switch the device off and open its microSD card on a computer.
- Open
wifisettings.txtin the root of the card using a plain-text editor. If it is absent, create it with that exact filename. - Set the following two lines to your network name and password, keeping the spelling and capitalisation of the field names shown below. Preserve any other existing settings in the file.
- Save the file, eject the card, return it to the device and switch on. Connection is attempted during startup.
WIFIName=YourNetworkName
WIFIPassword=YourNetworkPassword
Connect through a phone hotspot
A phone hotspot lets you connect EchoTracer when there is no home Wi-Fi available, for example while away from home.
- Enable the Wi-Fi hotspot or Personal Hotspot in your phone’s settings. Make a note of the hotspot network name and password.
- Use a 2.4 GHz hotspot. If your phone offers a Wi-Fi band or compatibility option, choose 2.4 GHz or enable its compatibility mode.
- With EchoTracer switched off and USB disconnected, open its microSD card on a computer. In
wifisettings.txt, setWIFINameto the hotspot’s network name andWIFIPasswordto its password. These replace the previously saved network details. - Save the file, eject the card and return it to EchoTracer. Keep the hotspot enabled, then switch EchoTracer on.
- Look for the green aerial on the scan screen. For clock synchronisation and firmware updates, the phone must also have a working internet connection; enable mobile data when using a cellular connection.
Keep the phone nearby and its hotspot switched on while using the connection. Firmware downloads may use your mobile data allowance. To return to a different Wi-Fi network later, update the same two lines on the card and restart EchoTracer.
Connect to ParaLink-Mesh

Find out more about ParaLink-Mesh, including how to get started.
With a compatible ParaLink-Mesh app or server running on the same local network, EchoTracer attempts to discover and connect to it automatically. A blue ring in the connection icon indicates an app connection. Use the ParaLink-Mesh page linked above for app setup and supported features. If you are using the phone as a hotspot, keep that hotspot enabled while using ParaLink-Mesh.
Update firmware
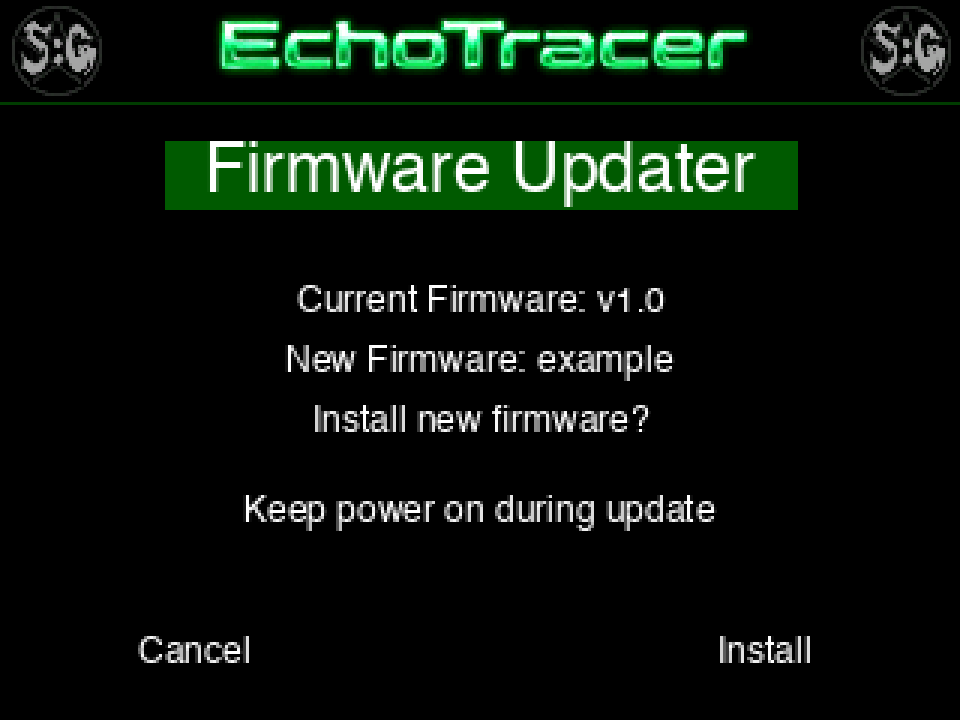
Connect to Wi-Fi and charge the battery to at least 50%, or connect charging power. Keep power connected throughout installation.
- Stop scanning and open Menu → Firmware Update.
- Wait for the firmware and connection checks. If requested, allow up to 45 seconds for clock synchronisation.
- If the device reports Already up to date, press A to return. You can press B to check again when no installation prompt is showing.
- If Install new firmware? appears, release all buttons. Press A to cancel or press C to install.
- Wait while the download percentage increases. Keep the device powered on.
- After Installed! and Restarting EchoTracer, the device restarts automatically.
Troubleshooting
| What you see | What to do |
|---|---|
| Device will not switch off while charging | Disconnect the USB cable, then quickly press the red side power button twice. The device normally remains on while USB power is connected. |
| USB cable turns the device on | This is normal. Leave the scan stopped while charging; unplug USB before using the double press to switch off. |
| No License! | Switch off and check that the supplied microSD card is inserted and its licence file is present. If the message persists, contact the supplier with the device details. |
| No audible alerts | Enable Play Audio, save with A, and check that a distance change exceeds the tolerance after calibration. |
| Too many change alerts | Increase Tolerance in App Settings and save with A. Keep the device still; stop and restart the scan to establish a new reference. |
| No saved images | Enable Save Images and save with A. An image is saved only when a sweep containing a qualifying change reaches its end. Check card space and look in both image folders. |
| NO INTERNET CONNECTION | Check wifisettings.txt, return the card and restart the device. |
| Time not synced / Network time unavailable | Allow time for synchronisation. Check internet access; if needed, try another configured network or hotspot. Leave the updater with A and retry. |
| Update blocked / Battery below 50% | Charge to at least 50% or connect charging power, then press B to check again. |
| Wi-Fi disconnected; reconnect | Restore the network connection; restart the device if needed, then reopen Firmware Update. |
| Version, download or installation error | Record the message. Return with A and retry after checking power and internet. If it persists, give the message to the supplier. |
| No ParaLink connection | Check that the compatible app or server is running and reachable on the same local network. Scanning remains available on the device. |

Spirit Talker Lite
Spirit Talker LiteUser guide Get started with word responses, Yes / No, Emoji and Flappy ... Read more

SpecTracer User Guide
SpecTracerUser guide Scan your surroundings, compare distance readings with an initial reference scan, and receive ... Read more