
Spirit BellUser guide
Set up your bell, choose which sensors can trigger it, adjust sensitivity and save your sessions.
Contents
- Get to know Spirit Bell
- Power, reset and charging
- Use the main menu
- Start a bell session
- Read the graphs and sensor tiles
- Enable or disable individual sensors
- Adjust sensitivity
- Switch the bell or logging on and off
- Recalibrate the comparison readings
- Adjust Bell Offset
- Save and review CSV recordings
- Browse, graph and delete files
- Set date and time
- Connect to Wi-Fi
- Connect to ParaLink-Mesh
- Update firmware
- About
- Troubleshooting
Get to know Spirit Bell
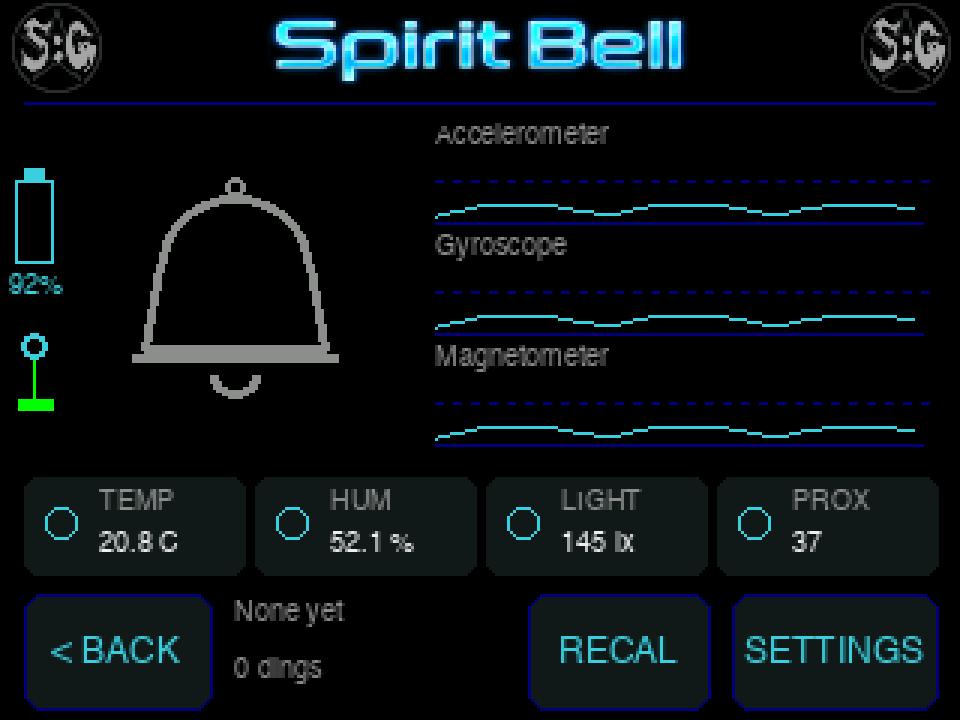
Spirit Bell watches for changes in seven sensor readings and moves its bell mechanism when an enabled sensor crosses its threshold. Use the touchscreen menu icons and labelled controls. The live screen shows three motion and magnetic traces, four environmental tiles, the most recent trigger and a ding count.
| Control | Action |
|---|---|
| < BACK on the live screen | Stops live detection and logging and returns to the menu. |
| RECAL | Takes fresh comparison readings, clears graph history and resets the ding count. |
| SETTINGS on the live screen | Opens sensor controls while detection and logging continue. |
| BELL ON / BELL OFF | Shows the current bell state. Tap to toggle it. |
| LOG ON / LOG OFF | Shows the current logging state. Tap to toggle it. |
| Tap a live graph or tile | Toggles that sensor’s ability to trigger the bell. |
Power, reset and charging
- With Spirit Bell switched off, insert its supplied microSD card. Keep the supplied licence and configuration files on it.
- Press the left-side power button once. Wait for startup to finish and the menu to appear. Green LED flashes accompany startup checks.
- To switch off, leave live monitoring with < BACK, then hold the left-side power button for about six seconds.
- To charge, connect USB-C to a suitable USB power source. Connecting USB may turn the device on.
- To charge while switched off, keep USB connected and hold the power button for six seconds. Charging continues while the device is off.
Briefly press the bottom RST button to restart an unresponsive device. Holding RST for about three seconds enters hardware download mode; use a brief press for a normal restart. Do not switch off, reset or disconnect power during a firmware installation.
Power and RST button actions are checked against Hardware power reference.
On the live screen the battery indicator is green normally, red at 25% or lower and cyan while charging is reported. — means the battery level is unavailable.
Use the main menu
| Row | Left to right |
|---|---|
| Top | Spirit Bell, Settings, Date, Time |
| Bottom | Wi-Fi, Files, Update, About |
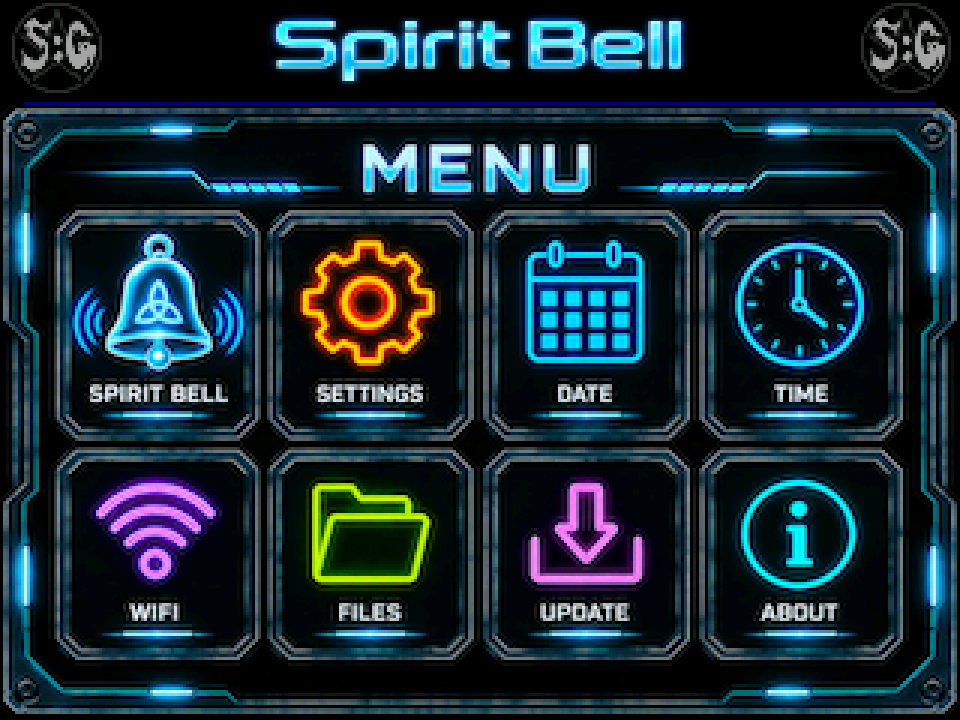
Start a bell session
- Place Spirit Bell on a stable surface with room for its bell mechanism to move. Keep nearby objects clear of the mechanism.
- Tap the Spirit Bell icon at the top left of the menu.
- Keep the device still while it displays Calibrating… and Do NOT move device! Wait for the live screen.
- Check SETTINGS: BELL ON allows strikes; LOG ON enables CSV recording. Saved choices are restored at startup, so check both before each session.
- Watch the traces and tiles. An enabled sensor crossing its threshold can ring the bell; the trigger label and ding count update.
- Use < BACK on the live screen to finish the session and return to the menu.
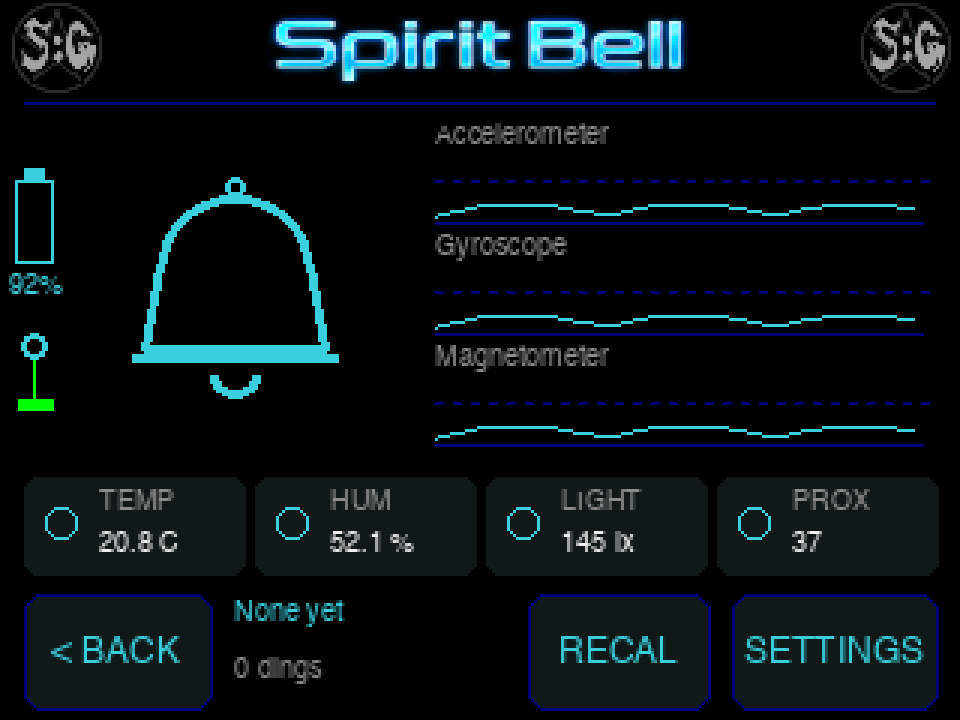
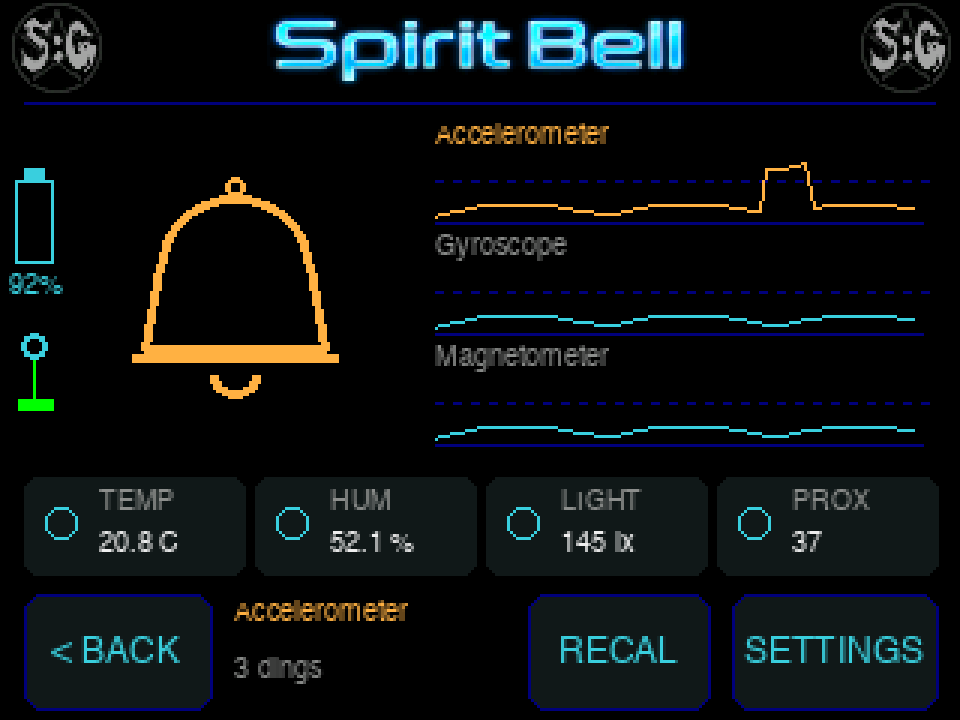
After a strike, Spirit Bell waits about 1.5 seconds before accepting another trigger, allowing movement to settle. Motion, magnetic and optical references are refreshed after this pause to reduce repeated triggers from the mechanism or a lasting nearby object. The red LED flashes during a strike event. A ring records a sensor threshold event; consider handling, vibration, nearby magnets, light changes and other ordinary environmental causes when reviewing it.
Read the graphs and sensor tiles
| Display | What it shows |
|---|---|
| Accelerometer | Changes in acceleration or orientation. Handling and tilting can trigger it. |
| Gyroscope | Changes in rotation rate. |
| Magnetometer | Changes in magnetic readings. Nearby magnetic objects and the bell mechanism can affect it. |
| TEMP | Current temperature in °C. |
| HUM | Current relative humidity in %. |
| LIGHT | Ambient light in lx or klx. HIGH indicates saturation; — indicates unavailable readings. |
| PROX | Relative proximity-sensor counts, not a distance in centimetres. |
The three live traces show change relative to each sensor’s trigger threshold. The dotted line marks 100% of that threshold; the trace range extends to 150%. About 3.6 seconds of history is shown. Changing sensitivity changes the trace height relative to the threshold. Amber highlights identify the recent triggering sensor. A disabled sensor is marked OFF in red.
Temperature and humidity refresh about once per second; motion and optical readings are sampled more frequently. Light and proximity can respond to increases or decreases from their reference. Keep fingers away from the optical sensor unless intentionally checking its response.
Enable or disable individual sensors
- On the live screen, tap a graph, including its label, to toggle Accelerometer, Gyroscope or Magnetometer.
- Tap a lower tile to toggle Temperature, Humidity, Light or Proximity.
- Alternatively, open SETTINGS and tap the sensor’s ON/OFF button.
- When re-enabling a sensor, let it take a fresh reading before expecting a trigger.
OFF excludes that sensor from triggering the bell. Shared sensor hardware can still be sampled and included in CSV data. If all sensors are off, no sensor can trigger a strike even when the bell itself is enabled.
Adjust sensitivity
- Tap SETTINGS on the live screen, or open Settings from the main menu.
- Use the upper < and > arrows to move through the three settings pages.
- Tap + or – beside a sensor to adjust its sensitivity from 0.2x to 5.0x in 0.1 steps.
- Higher values make that sensor more sensitive: 2.0x needs half the change required at 1.0x. Lower values require larger changes.
- Use BACK to return to the live screen or main menu, depending on where you opened Settings.
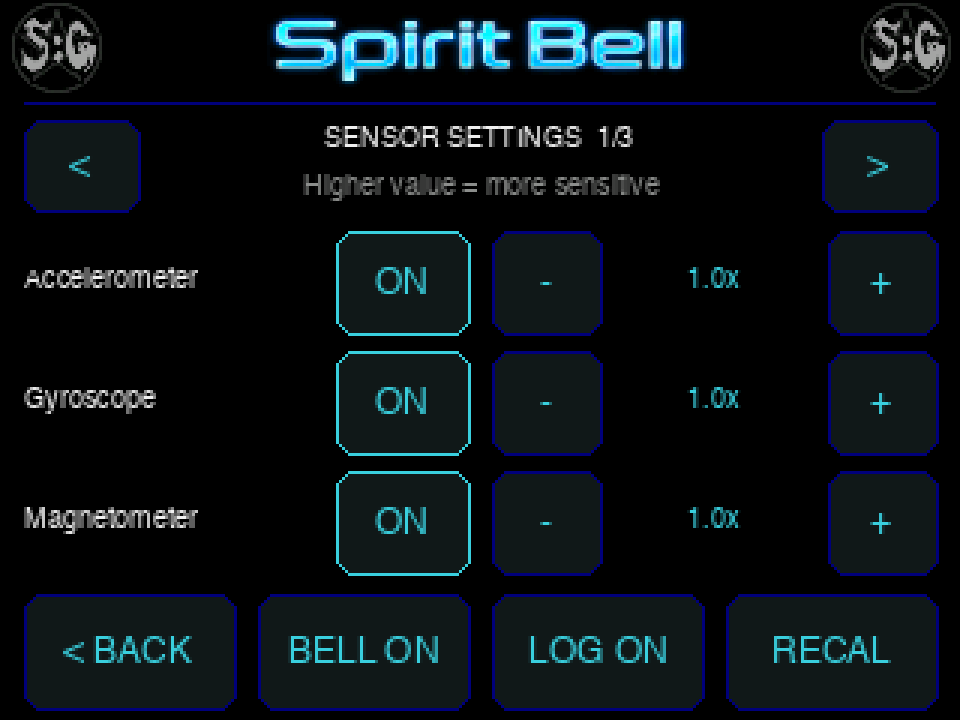

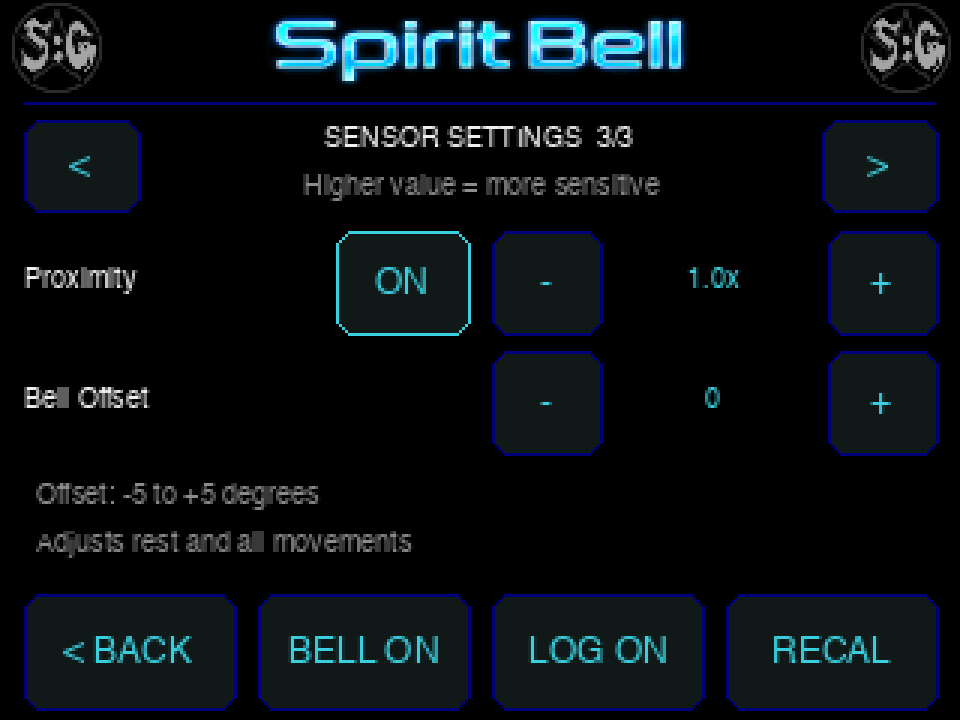
Settings opened from the live screen: detection and logging continue while you adjust controls. Tap BELL ON to disable strikes while changing settings if required. Settings opened from the main menu: viewing settings does not start live detection or recording. Changes are saved automatically to the microSD configuration when the mechanism is idle; there is no SAVE button. Leave the device powered for a moment after changes.
Switch the bell or logging on and off
On any settings page, tap BELL ON to change to BELL OFF. Tap again to enable it. BELL OFF stops new strikes while readings and enabled logging can continue in an active session. It also returns the mechanism to its resting position. The label describes the current state.
Tap LOG ON to disable CSV recording, or LOG OFF to enable it. This does not change whether the bell can ring. Bell, logging, sensor ON/OFF choices, sensitivity and Bell Offset are saved to the card and restored after restart when saving succeeds.
Recalibrate the comparison readings
- Put Spirit Bell in its intended position and keep it still.
- Tap RECAL on the live screen or a settings page.
- Wait until calibration finishes. The ding count resets to zero and the live trace history clears.
- Allow the short settling pause before testing a sensor again.
RECAL takes new comparison readings; it does not restore factory settings or erase earlier CSV rows. It keeps the existing log file when one is already available. Opening a new live session also calibrates; the ding count is explicitly reset by RECAL, so use it when you want a fresh count.
Adjust Bell Offset
- Open Settings and use the upper arrows to reach page 3/3.
- Use the Bell Offset – / + controls to move the alignment in one-degree steps, from -5 to +5 degrees.
- Watch the resting position as you adjust. Each change previews the new resting alignment and also shifts all strike movements.
- Leave the mechanism clear while it moves. The setting saves automatically to the card.
Bell Offset adjusts alignment, not sensitivity or strike count. Start near 0 and make small changes. If the mechanism cannot move freely or does not strike correctly, turn the device off before inspecting the physical setup.
Save and review CSV recordings
While a bell session is running with LOG ON, Spirit Bell normally writes a CSV row about four times per second and an extra row for a trigger. Readings and logging also continue in Settings opened from that live session. Returning to the main menu stops both. Reopening the live screen creates a fresh log if logging is enabled; turning logging off and back on within the same session can continue the existing file.
With a valid clock, files are saved under DateTimeFiles/, for example SpiritBell_2026-10-18_14-30-00.csv. Without a valid clock they use NumberedFiles/SpiritBell_1.csv and the next unused number after the highest existing one. Duplicate dated names receive a suffix. A valid RTC clock can provide dated filenames even without Wi-Fi.
CSV columns contain device uptime in milliseconds, raw motion/magnetic axes, temperature, humidity, changes from comparison readings, optical readings and changes, plus Bell and Trigger. An event row has Bell=1 and its trigger name; ordinary rows have Bell=0. Light CSV values are raw sensor counts rather than the lux shown on screen. Copy the files to a computer to review them in a spreadsheet. LOG ON is a preference, so check the card afterwards to confirm a recording was saved.
Browse, graph and delete files
- From the main menu, open Files. Choose Numbered files or Date & time files.
- Use UP/DOWN or vertical swipes to browse the list. Tap a filename to read it.
- Use UP/DOWN or vertical swipes to move through text pages; use BACK to return. REFRESH reloads the list.
- Tap GRAPH beside a compatible CSV to view its recorded sensor changes. Use the lower < / > buttons to cycle seven sensors.
- To delete, tap DEL in the list or DELETE in the text viewer. Check the filename, then choose CANCEL to keep it or DELETE to permanently remove it.
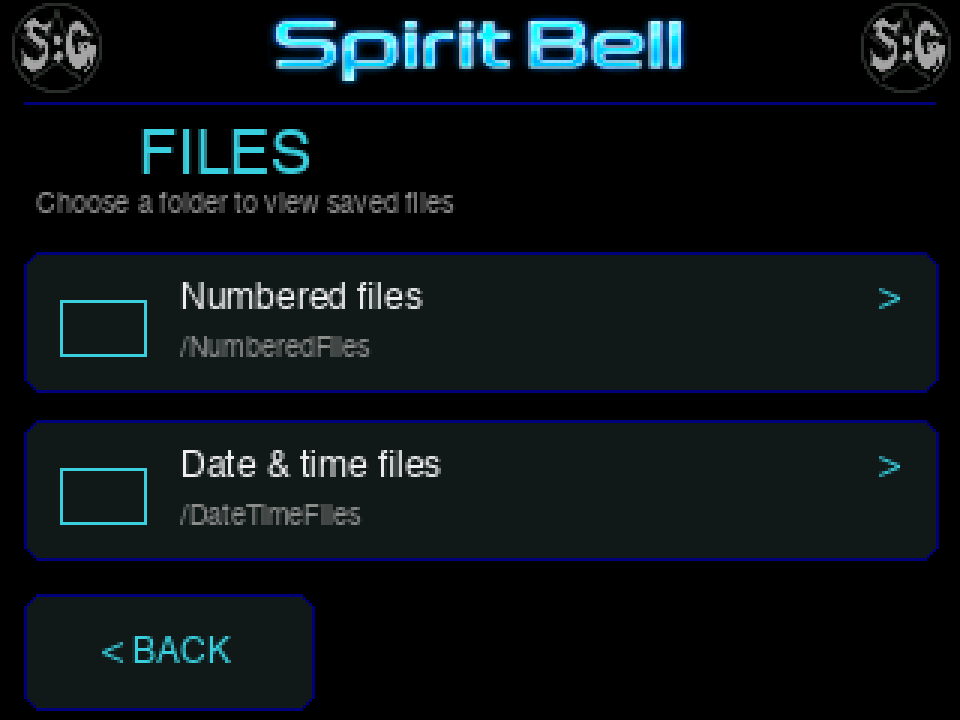
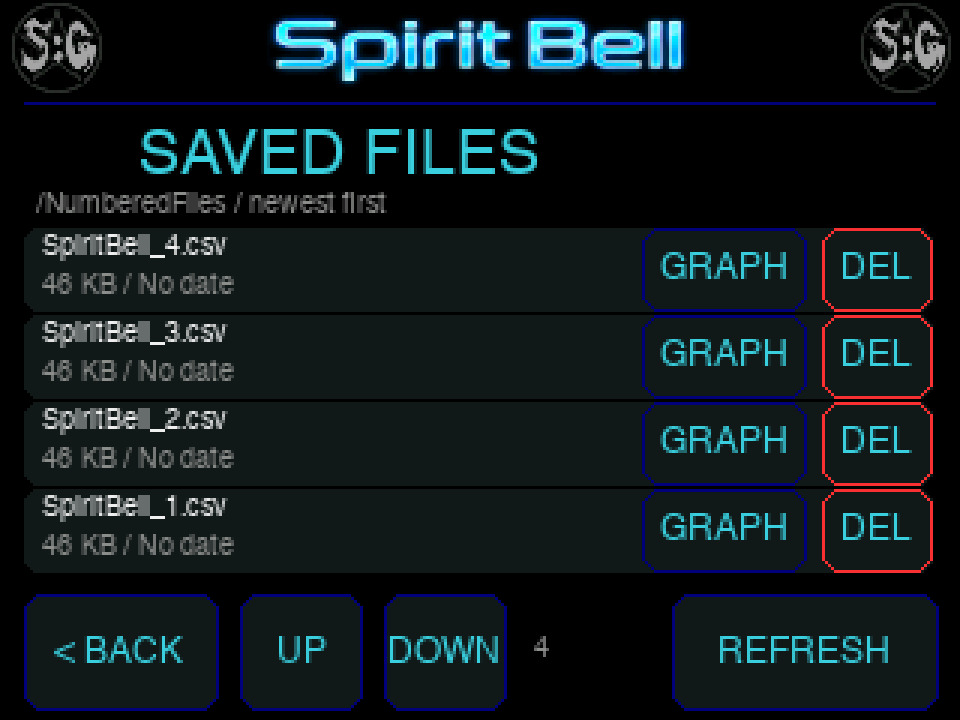
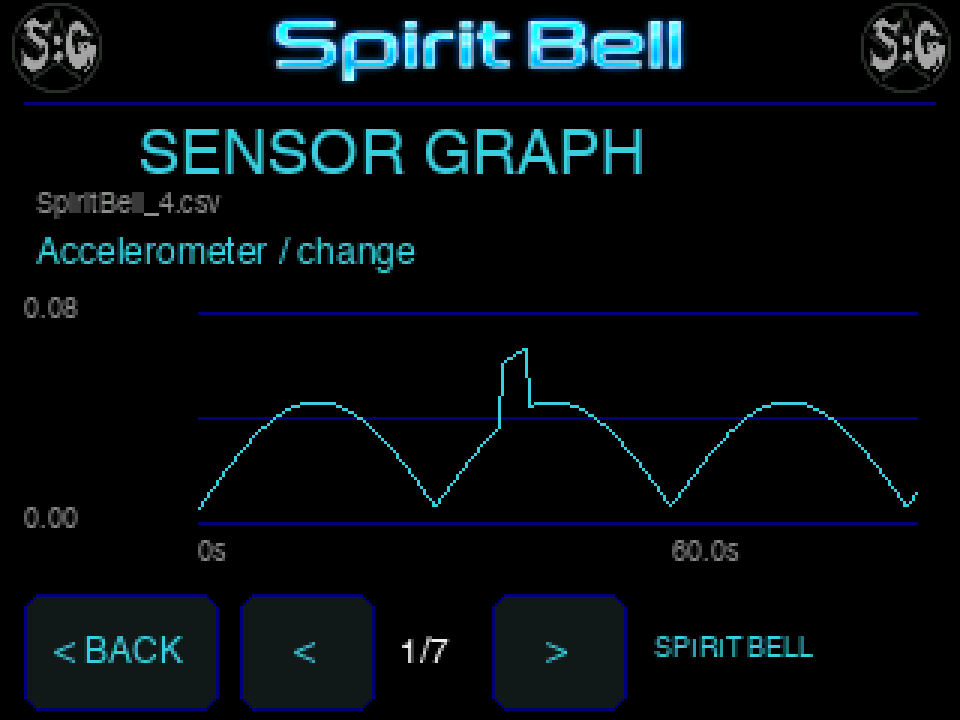
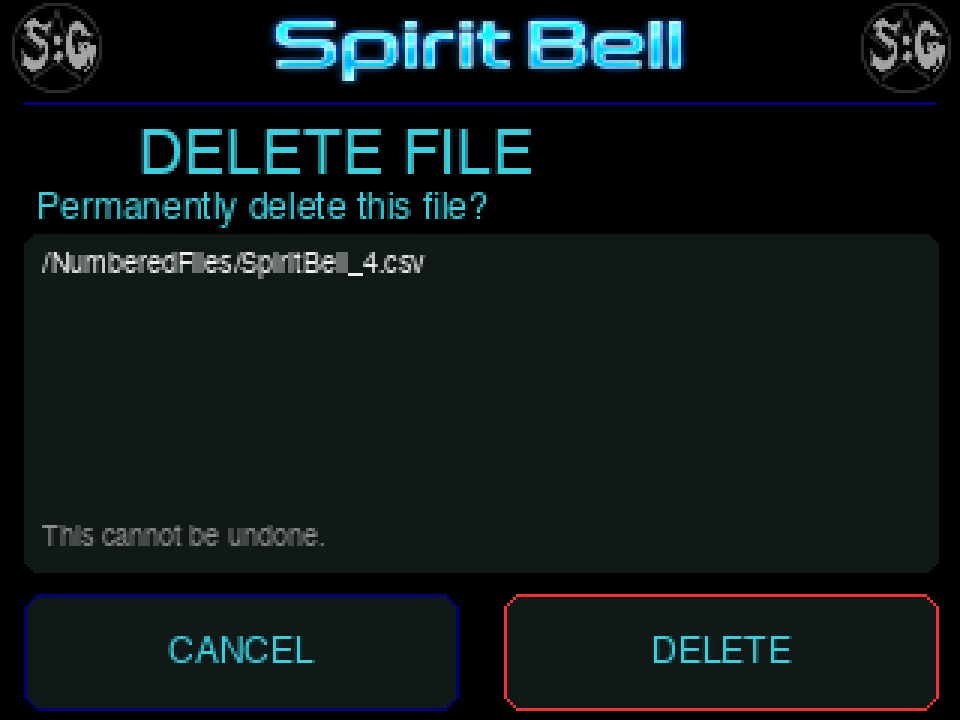
Deletion cannot be undone on the device. To copy recordings, leave the live session, switch off, remove the microSD card and copy the CSV files using a computer. Return the card before switching on. Saved graphs show change values rather than the absolute temperature and humidity values shown in live tiles.
Set date and time
- Open Date from the menu. Tap or hold + and – to change day, month and year.
- Tap SAVE to apply the date. BACK leaves without applying edits.
- Open Time. Adjust hour and minute using + / -. Hours use the 24-hour format.
- Tap SAVE to apply the time with seconds set to zero.
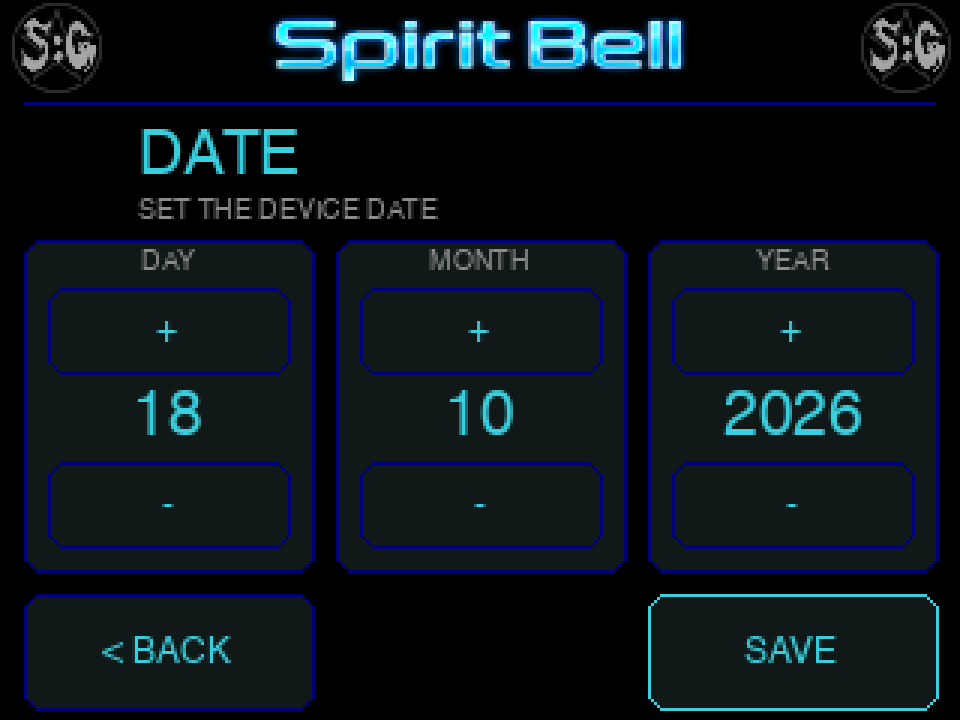
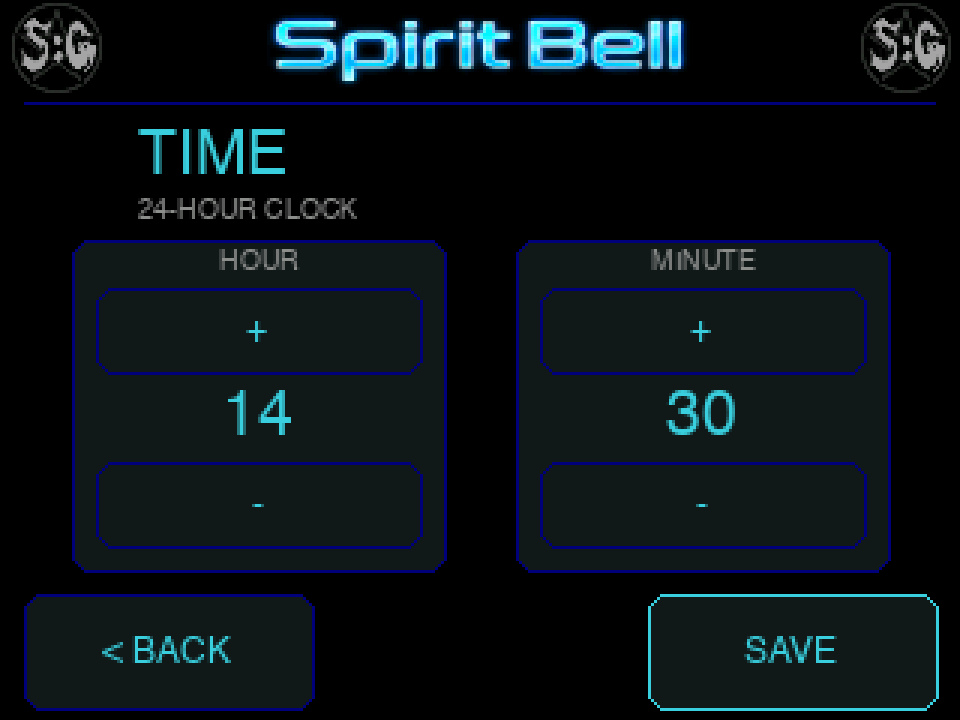
The clock can be restored from the RTC and synchronised over the internet. Network synchronisation can replace a manually entered time. Check the displayed clock and new filenames after reconnecting.
Connect to Wi-Fi
Bell detection and card recording can work offline. Wi-Fi is used for network time, firmware updates and ParaLink-Mesh. Enter network details on the card; the Wi-Fi screen displays status rather than a keyboard.
- Switch Spirit Bell off before removing the card.
- Open
wifisettings.txtin the card’s root folder with a plain-text editor. - Set the following network fields to your own values, preserving other entries.
- Save and eject the card, put it back and restart Spirit Bell.
WIFIName=YourNetworkName
WIFIPassword=YourNetworkPassword
Connect through a phone hotspot
Enable the phone’s Wi-Fi hotspot or Personal Hotspot, using 2.4 GHz or its compatibility option. Enter that hotspot’s name and password in the same file fields. Keep the hotspot running and nearby, then restart Spirit Bell. Internet time and firmware downloads also need working internet access on the phone and can use mobile data.
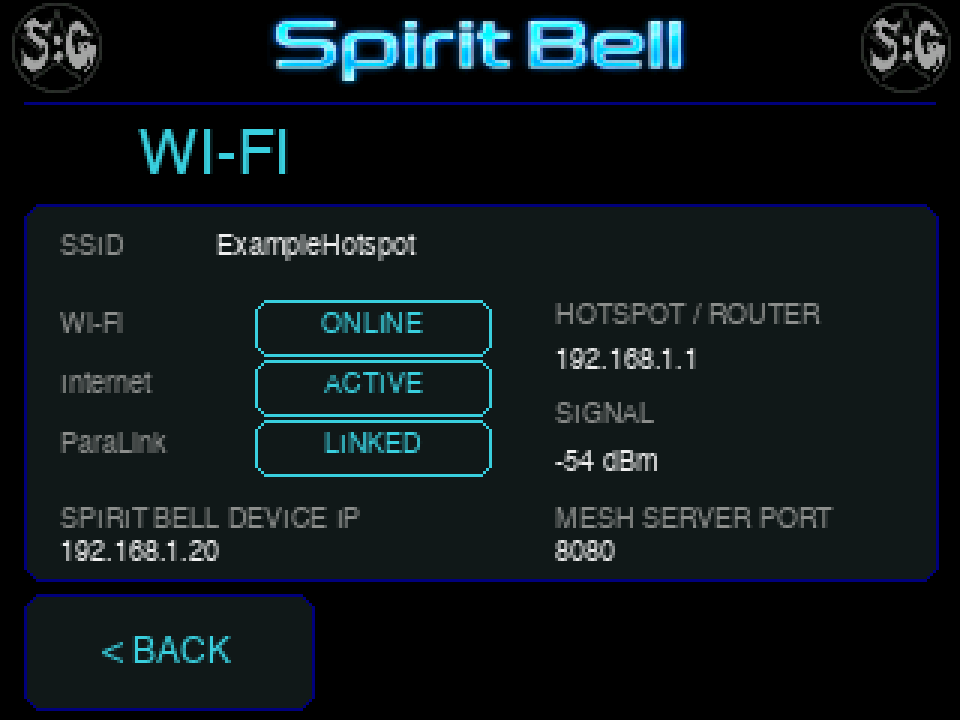
The Wi-Fi page shows network, internet and ParaLink status, addresses and signal strength. The Internet label follows the app’s connection state; it is not a continuous independent internet test. The displayed mesh port is connection information, not a file-download website.
Read the aerial icon

Wi-Fi disconnected
Red aerial: no Wi-Fi connection. Local detection and card logging remain available.

Wi-Fi connected
Green aerial: connected to Wi-Fi; this alone does not confirm internet or a mesh link.

ParaLink-Mesh linked
Cyan ring with green stem: linked to the companion mesh app over Wi-Fi.
Connect to ParaLink-Mesh

Open the ParaLink-Mesh information and setup page. Run the compatible app on a device reachable over the same local Wi-Fi network or phone hotspot. Spirit Bell attempts discovery and connection automatically. Look for LINKED on the Wi-Fi page or the cyan aerial ring on the live screen. Local mesh communication does not require internet. Remote screen touches have the same effects as touching the device; leaving the live screen stops its session.
Update firmware
- Finish the live session and connect stable USB power and Wi-Fi with internet access.
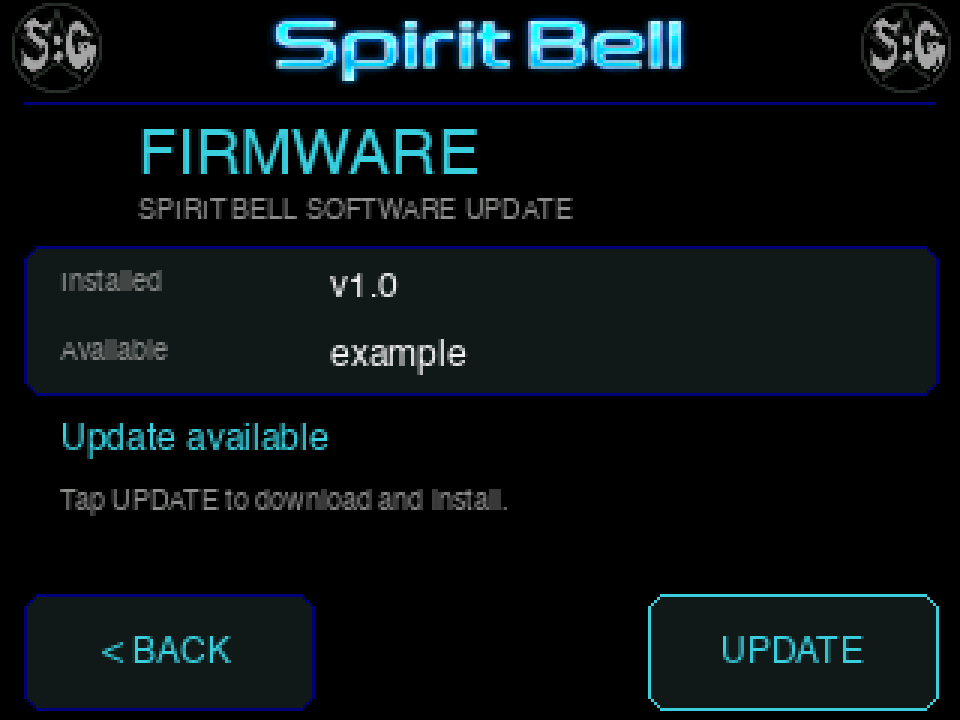
- Open Update from the menu and wait for the installed and available versions.
- Tap UPDATE if offered, or CHECK to check again when up to date.
- Leave the device powered and connected while it installs. Do not press power or RST.
- After successful installation, the device restarts automatically. If an error appears, restore the connection and tap RETRY, or use BACK.
About
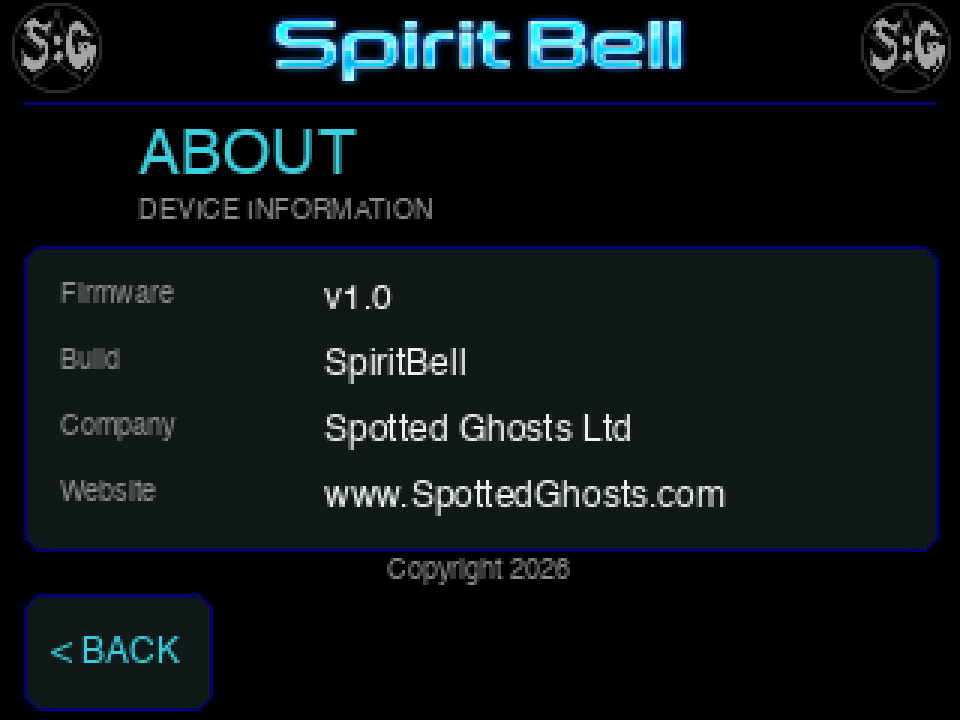
Open About to see firmware version, build, company and website details. Include the version and any error message when requesting support.
Troubleshooting
| Problem | What to check |
|---|---|
| No bell strike | Check BELL ON, at least one sensor ON and suitable sensitivity. Wait for calibration and the settling pause to finish. Confirm the mechanism is clear. |
| Repeated or unwanted strikes | Keep the device still, consider nearby magnets, movement and changing light. Lower the relevant sensitivity or turn that sensor OFF, then RECAL in the intended position. |
| Hand near the device rings it | A hand can change both light and proximity. Proximity has priority when both qualify together. Disable either sensor if it is not wanted. |
| Sensor shows OFF | Tap its graph/tile or enable it in Settings. OFF is an intentional trigger setting. |
| — or HIGH in a tile | — indicates unavailable readings; HIGH means light saturation. Check illumination and supplied sensor connections with the device off. |
| No new CSV | Check LOG ON and that a live session was open. Check card space and write access after switching off. LOG ON alone does not verify a successful write. |
| Changes not retained after restart | Leave time for automatic saving while the mechanism is idle. Check the card and its write access. |
| Ding count not zero on a new visit | Tap RECAL to explicitly reset the count and establish fresh comparison readings. |
| No Wi-Fi or mesh link | Check the card network details, hotspot compatibility and running companion app; restart. |
| No License! | Switch off and check that the supplied microSD card and licence file are present. Contact support if the message persists. |
| Unresponsive screen | Briefly press bottom RST to restart, except during firmware installation. |

Spirit Music Box
Spirit Music BoxUser guide Set up sensor-triggered music, calibrate distance detection and save your sessions. ... Read more

Environ Instructions
ENVIRONUser guide Monitor environmental readings, record CSV sessions, reset your comparison reference and review saved ... Read more